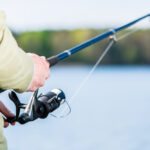
When you’re learning to fish, it’s important to master the basics, including how to spool a baitcasting reel successfully. When the fish are happily snapping away, the last thing you want to happen is for your line to snap and spoil the fun.
Being able to spool a baitcasting reel properly will reduce the chance of backlash, line twists, and other maintenance issues you’ll want to avoid so you can enjoy a frustration-free fishing trip with minimal mistakes or accidents. Luckily for you, spooling a baitcasting reel isn’t all that difficult to master.

Compared to spooling a line on a spinning or spin-cast reel, spooling a line on a baitcasting reel is a much simpler task. By preparing and spooling your fishing reel in advance, you’ll know that when you’re out on the water, you know what you’re doing, and you can focus your full attention on the fish below for a better chance at getting a catch.
What You’ll Need to Spool a Baitcasting Reel
Don’t worry if you’ve never done this before, as you don’t need a whole toolbox of expensive equipment. To spool a baitcasting reel, just make sure you have the following:
- Fishing rod
- Reel
- Line
- A sharp tool to cut the line – I would personally recommend nail clippers or a pair of nail scissors that are sharp enough to cut the line yet small enough to carry with you relatively easily
- A lure, hook, or a weight to tie off the end of the line
Time to Get Practicing
First, ask yourself a few questions to ensure you’re using the right spool for your baitcasting reel (learn about the champion-named Abu Garcia Jordan Lee Baitcaster Combo here).
Baitcasting Vs. Spinning
Even though there are some fundamentals of spooling a reel that is practically the same regardless of reel type, there are a few key distinctions between each approach that you should know about if you’re to spool your reel successfully.
Baitcaster reels require their line to be fed through the line guide, which usually appears as a small hole at the front of the reel before the line can be tied around the reel spool. Comparably, when spooling a spinning reel, the line needs to be on the correct side of the bail, which is easily done by opening the bail before tying the line around the spool.
What Knot?
An arbor knot is probably the best type of fishing knot to use when you’re tying the line around the spool. The good news is, it’s pretty easy to learn with just two overhand knots.
It can be slightly tricky to tighten the inside knot, as you need to do this slow enough for the line to slip a little as it’s tightening to create some friction through this movement.
Maintaining Tension
Whatever else you take from this article, remember this: You must maintain the tension when you’re spooling a reel, especially when reeling in the new line. Letting the line go slack or otherwise spooling it incorrectly can create loops of loose parts in the line, leading to several issues.
For example, the less tension you maintain while you’re spooling the reel, the more inconsistent your casts will be as they’ll take different amounts of time to unravel when cast. This means you’ll have less control and a reduced level of accuracy and precision.
There’s also the fact that the line can become damaged if the proper tension isn’t maintained and you end up with a loose loop somewhere back around the 4th loop, as this can result in binding or kinks in the line, weakening it at certain points where it’s more likely to snap or break. Not only can this cost you your catch, but it’s also a waste of perfectly good lures.
Method: Step by Step Instructions
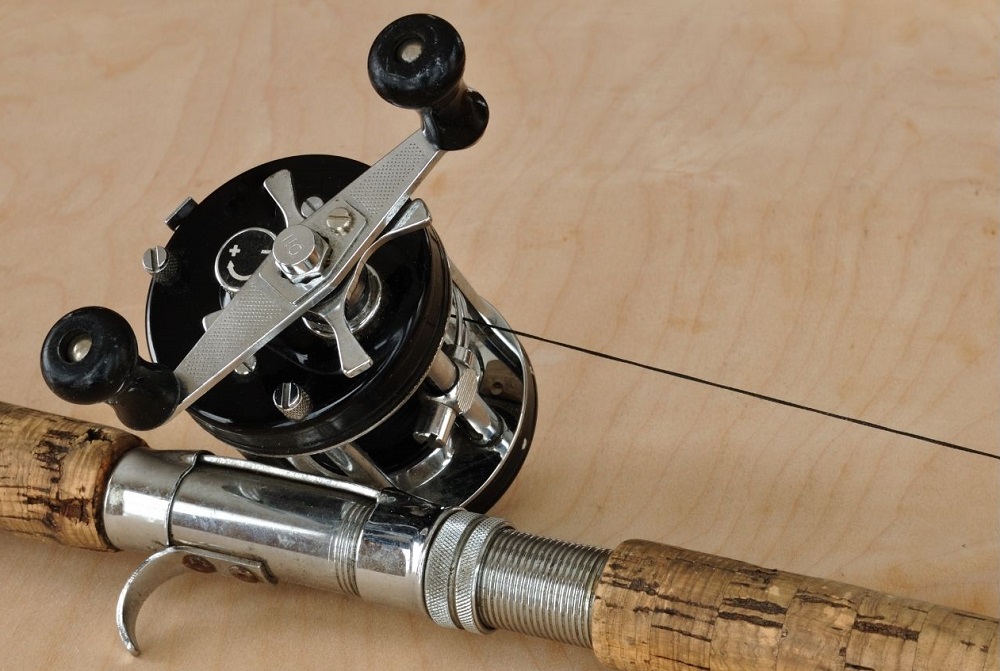
- Correctly Locate Your Line: Feed the line through the guide on your baitcaster reel, making sure you do this beforehand so that the line doesn’t become bunched or uneven in places. Alternatively, if you have a lot of spare time on your hands and you’re not afraid of a challenge, you could always do this manually.
- Loop the Line Around the Reel Spool: Okay, now comes the slightly trickier part. Baitcaster reels can come with or without holes in the spool, so this step depends on what type of reel you have.
If there are holes in the spool of your baitcaster reel, thread the line through the holes before twisting the handle so that the line loops around the spool. Without holes, you’ll need to work harder to make sure the line gets around the spool.
The goal is to get the spool to directly feed onto the reel, which can be achieved by propping it upright with a pen pushed into the center.
- Tie an Arbor Knot Around the Spool: This is the part where you get to tie your two overhand knots together! It’s nice and easy; just make sure the knots have been tightened properly so they create enough friction that will start the spooling. This is the moment of truth because if the line is loose, you’re about to find out.
- Maintain Tension as You Reel – Pinch The Line: We’ve already mentioned how important it is to maintain the tension in the line, so now it’s time to put it into practice. By pinching the line at the front of the reel before you begin reeling, you’ll be able to keep it tight enough without it going slack.
However, don’t overdo it either, as it’s too tight, and you won’t be able to reel it in. Monofilament and fluorocarbon require extra care due to their natural stretch, which can cause damage under tension, but you should try to keep the stretch to as little as possible without letting it get too loose.
- Reel It In: Now that you’ve got a good amount of tension, maintain this as well as you can and reel in the line until you’ve left only an ⅛” gap between the line and the outer spool, which is referred to as being “full” by the majority of manufacturers.
- Feed the Line Through the Rod Guides: Now, you can run the line through the handy guides on your baitcasting reel, making sure to leave yourself a few feet of additional line at the end.
- Lure or Hook? Tie-Off and Prepare: This one’s all about keeping that tension nice and taught (but not too tight) and making sure the line doesn’t begin to back up or get tangled on the reel. When it comes to whether or not you should tie off with a lure or a hook, a lot of this decision will depend on your personal preferences.
I’d personally recommend tieing off with a small size hook, especially when you’re just starting, and you’re worried about wasting some of the lures during this step.
Frequently Asked Questions
Should I string the line through the guides before or after?
While it probably doesn’t make much difference, I always think it’s easier to string the line through the guides after you have more control and a better chance at maintaining the tension as you reel it in.
However, if you prefer to do it before, then there shouldn’t be any problems with this.
Do I need to keep the spool of the line face up?
This rule technically only applies if you have a spinning reel, but it will also be the same way as some manufacturers will load the line onto the spool and the direction in which it will fly through the air when you cast your reel.
What do I do if there are any loose loops on my reel?
Depending on where the loose loop is and how close it is to the surface, you may be able to get away with pulling on the line until it’s taught.
If it happened earlier in the spooling process and is buried deeper under the loops, you’ll need to unravel it until you reach the loose loop, and you can then re-reel it while maintaining a better tension.
How can I reduce the chances of my line twisting when I’m spooling a new line on the reel?
If you follow the step-by-step instructions we’ve detailed in this article, and you remember to maintain tension well at all times when you’re spooling your reel, then there shouldn’t be much of a chance of the line becoming twisted in places.
If there are existing twists in the line you’re using, work out the direction in which the twist faces and turn the spool over to try and straighten the kink out.
How much of the line should I use?
You’ll need to check how much line your reel can hold to answer this one, as you shouldn’t use more than it can handle.
It’s pretty much impossible to know for sure what a theoretical 150 years out of 600 yards of the spool will translate to on the reel, but fill it until there’s about a ⅛” gap between the outer line and the outer spool.
Can you overfill or underfill your spool?
Yes, you can overfill and underfill your spool. If you overfill your reel, then you may run into trouble when you’re trying to cast, which can hinder your success and can even cause damage to the reel. Overfilling can also cause any water absorbed by the line to remain trapped, which will weaken the line’s strength and lead to potential breakages or snapping.
Underfilling will increase the speed at which your reel spins without improving anything else, but the extra friction can hinder the distance you’re able to reach when you cast.
How do I prevent braided lines from slipping?
Monofilament or fluorocarbon tends to be less smooth, meaning there is a higher amount of friction. Still, the braided line is more likely to slip, which can be a problem when you’re trying to get the spooling started.
You can prevent this issue by using a short backing line of the two rougher types of line, monofilament or fluorocarbon, for a few feet or up to ⅓ of their spool to make it easier to get started before switching to a braided line. You can then tie a knot (we recommend a double knot) to attach the backing lie and the braided line.